
Lauhala Searching, Collecting, and Preparation Process
- Kaiya-lynn Kaha

- Oct 2, 2019
- 4 min read
Updated: Oct 29, 2019
Searching and Collecting Hala:
Look at the ground and at the base of the Hala tree for the leaves that are maloʻo (sun-kissed/dried). The browner leaves that are still connected to the trunk of the tree, below the green ones, may also be collected and used. One way of checking if your leaf is in good condition to process and strip is to look at the bottom ends. The curved ʻCʻ like ends should not be frayed or ragged. The ones that look torn up or worn should be discarded. The ends that look intact and has a defined ʻCʻ shape are good quality and should be kept.


Carry and drag the leaves by the tip to avoid crushing the useful middle part of the leaf. Depending on what color lauhala you want you may either want to store it outside in a dryer environment or inside. lauhala that is stored in a darker and more moist area tends to develop a darker color. While storing lauhala in an outside and dry environment bleaches the leaves and develops a lighter hue.
Preparation Process:
Cleaning
Wash the leaves with warm water to rinse off dirt and other debris


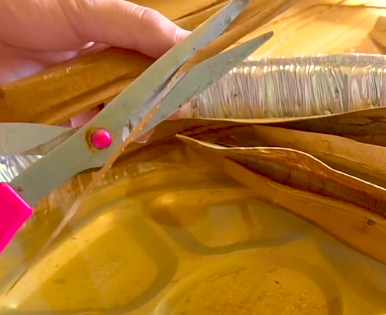
Cut the pointed tip of the lauhala and the base end thats shaped like a ʻCʻ 3-6 inch. (3 inches if your leaf is smaller and 6 inches if your leaf is bigger)

Remove the thorns on the sides by pinching and making a small slit in the side of leaf and stripping in the direction the thorns point towards to prevent injury (use scissors if you are not comfortable using your hands) Ancient Hawaiians would use shells to help remove these thorns (kōkala).


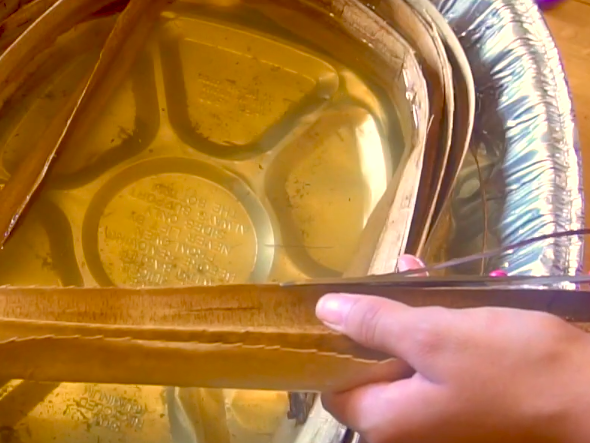


Take a knife or scissors and scrape off the thorns on the spine. To prevent getting stabbed by the thorns, start from the base of the leaf and scrape upwards (away from the direction of yourself).

Some people, using a knife, also shave down the thickened midrib at the base of the leaf to make it more flexible.
Softening
Many people do this step after they cut the thorns and ends off of the lauhala, however I find that doing this prior makes it easier to work with and less brittle when I start cutting things. While Im cleaning everything I then use a kettle filled with hot water to soften it further if I need to in the process.
In a bucket filled with water, place the leaves to soak for 15 minutes

After the 15 minutes. Continue to Hoʻopulu (soften) the leaf by rubbing it down with a wet washcloth. This will allow the moisture from the cloth to soak into the leaf and make it more pliable or simply massaging it underwater.

Flattening and Rolling (Pokaʻa)
To flatten it, start with the underside of the leave (less shiny side) upwards on the palm of your hand. With the one hand hold the base of the leaf, use your other hand and begin to roll the lauhala around your hand (under and over), into a coil.
When you meet the end of the tip, grab that end and hold it between your fore and middle finger of the opposite hand. Now start to roll the lauhala (over and under) in the reversed direction you had been doing earlier.
Repeat last two steps 6 to 8 times. This will help the lauhala to remain flat and flexible.

Storing
(At this point your lauhala should be flexible enough that it wraps tightly around your hand.) The leaves may become brittle after drying in the sun so this step is best to do during wet or during a cooler time of the day like the morning, when it rains, or evening, as the weather can affect the feel of the leaf.
Select a long and sturdy leaf from your lauhala and shape it into a circle where your two ends overlap.
Using a knife cut two small openings through both sides of the leaves.
In these cuts, insert a small piece of lauhala (can be from the scrap ends you cut off earlier) and wedge it in between the holes to secure the shape in place. This will be the start of your Kūkaʻa.
Place your other cleaned and prepared leaves within the circle and continue to do this until it creates a tight swirl of leaves.
As you build your Kūkaʻa (bundle) to tighten the leaves so that you can fit more inside and to make it more secure, twist the leaves outward to tighten it against the other leaves.
When your kūkaʻa is close to full; leaves should be individually wrapped and fit snuggly into the middle of the bundle.
When there is no room to fit anymore leaves, grab a string, insert it into the middle of your kūkaʻa (where the hole is) and tie the two ends of the string into a knot on the outside.
It is important to note that this is just one way lauhala is stored. Some people also start their kūkaʻa from the inside and work outwards; embedding each leaf into the other as they roll (Which I did in the video above).


Kumu weavers after they were finished making their kūkaʻa would compete against each other by throwing their bundles of lauhala against a wall and seeing which one would fall apart first. The oneʻs who fell apart first would be called stingy as they didnt "[pack] the roll with enough leaves to make it tight." (Adren J Bird et al. 31)
People may also treat the leaves and lighten them, this process is called ʻOlala. This is done usually with greener leaves. A hole is first made into the ground and a fire is created by lighting chips of lauhala wood within the hole. Once the fire starts to make clouds of smoke, green hala leaves were put over the fire. This would wilt them and help to create more flexible leaves to weave with. After this, the leaves would be put out into the sun to dry.
Click this link to direct you to more information on lauhala: https://kahacreations.wixsite.com/website/post/copy-of-lauhala-searching-collecting-and-preparation-process


Comments